
Notes
From Experience: Wins, Fails, and What Stuck:
Weigh Your Flour. Gluten-free flours don’t behave like wheat and don’t weigh the same by volume. For accuracy and consistent results every time, use kitchen scales. This is key to getting the texture right. Water temperature matters (37°C/100°F). Too hot kills the yeast, too cold won’t activate it. No thermometer? Dip your finger in; if you can comfortably hold it there and count to 10, you’re in the right zone. Mix thoroughly to hydrate the flour. Unlike wheat dough, this needs proper mixing so the flour can fully absorb the liquid. Don’t rush this step; it sets the foundation for structure. Rest the mixture for 10 minutes. This step matters. It allows the WEATZERO® millet flour to hydrate properly, improving texture and giving the dough a more cohesive, wheat-like feel. Mix again after resting. Once rested, give the dough another mix as per the method. You’ll notice it becomes smoother and more uniform, which helps create that soft, consistent crumb. Expect a different dough feel. It will be softer, stickier, and slightly more moist than traditional wheat dough. That’s exactly how it should be. Trust it. It comes together beautifully during baking. Adding more flour will throw off the balance and result in a dense loaf. Prepare your tin properly. Don’t skip this step. A quick oiling and a light dusting of flour make all the difference. It helps the loaf release cleanly, keeps your crust intact, and saves you time on cleanup. It’s one of those small things that makes bread baking feel easy and reliable every time. Wet hands make shaping easier. The dough is wetter than traditional wheat bread. Lightly wetting your hands or spatula makes it much easier to smooth the top without sticking. No second rise needed. Unlike wheat dough, this gluten-free dough only needs one proof. Once it’s risen in the tin, it’s ready to bake, no knocking back or reshaping required. Create steam for the first 15 minutes. A tray of boiling water in the bottom of the oven helps the loaf rise to its full height and creates a beautifully crisp, artisan-style crust. Remove from the tin immediately after baking. Letting it sit in the tin traps steam and creates a soggy crust. Turn it out straight away. Cool completely before slicing. This is non-negotiable. Cutting too early leads to a gummy texture. Give it time; you’ll be rewarded with a soft, fluffy crumb.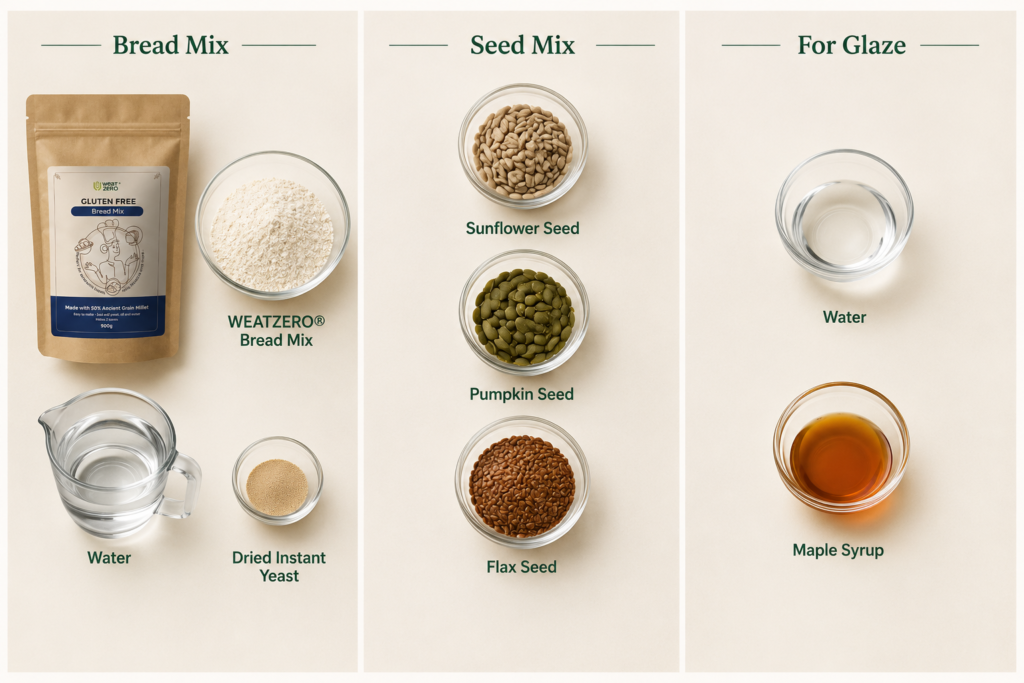
Ingredients
- 425 g WEATZERO® Bread Mix - weight using a scale
- 500 mL Water, warm - (37°C / 100°F)
- 7 g Dried Instant Yeast - 1 standard sachet
Seed Mix
- 30 g Sunflower Seeds
- 30 g Pumpkin Seeds
- 30 g Linseeds (Flaxseeds) Whole
For Glaze
- 1 TBSP Water
- 1 tsp Maple Syrup (or sugar, dissolved)

gluten-free-seeded-bread-loaf-equipment-weatzero
Method
Make the Dough
- In the stand mixer bowl weigh the WEATZERO® Bread Mix, yeast, oil, seed mix and water.Retain 1 tbsp of seed mix for topping.
- Using a spatula, mix everything together first. This helps fully incorporate the flour and prevents dry pockets.

- Once roughly combined, attach your mixer:Stand mixer: Beat on speed 3 for 2 minutesHand mixer: Beat for 2 minutes until fully combined.The dough will be thick and sticky, this is exactly what you want.

Rest & Hydrate
- Let the dough rest for 10 minutes. This step is essential, it allows the WEATZERO® flour to fully hydrate and improves the final texture.

Prepare the Loaf Tin (While Dough Rests)
- Lightly grease your loaf tin with oil, making sure you cover the base and all sides, corners included. You don’t need a thick layer, just enough to create a light coating. If you’re not using the bread mix itself for dusting, you can use any gluten-free flour like rice flour or tapioca starch.Once coated, hold the tin over the sink and gently tap out any excess flour. You’re aiming for a thin, even dusting, not a thick layer.

Final Mix
- After resting, beat the dough again: You’ll notice the dough becomes smoother and more cohesive.Stand mixer: 1 minute on speed 2Hand mixer: 1 minute
Transfer & Proof
- Transfer the dough into the prepared tin using your spatula.Using a wet spatula or damp fingers, gently smooth the top. This helps even out the surface and shape the loaf.

- Cover loosely with a clean cloth or plastic wrap.
- Leave in a warm place for 60 minutes, or until the dough rises just above the rim of the tin (doubles in size)

Preheat the Oven
- Preheat the oven to 250°C (482°F) (conventional) / 230°C (450°F) (fan forced) (428°F).Place a shallow baking tray on the bottom shelf of the oven while it preheats.For best results: Use conventional (non-fan) oven mode.

- Once the dough has risen, remove the cloth or plastic wrap. Brush the top of the loaf gently with the maple water wash. Sprinkle the retained seed mix on the top.

Bake
- When ready to bake, pour boiling water into the hot tray to create steam, then immediately place the loaf on the centre shelf and close the oven door.Do not knock or handle it roughly. Close the oven door carefully to avoid disturbing the rise.
- Bake for 15 minutes, Do not open the oven during this time, as the steam helps the loaf achieve maximum oven spring and a crisp crust.

- Carefully remove the tray of water from the oven and reduce the temperature to 220°C (425°F) conventional / 200°C (400°F) fan forced.

- Continue baking for 45 minutes, or until the loaf is a deep golden brown

Remove and Cool
- Remove from the tin immediately and cool completely on a wire rack (at least 90 minutes) before slicing.

Storage & Shelf Life
- Room Temperature: Store wrapped in a clean cloth or in a bread container, covered (not airtight), for up to 2 days. This keeps the crust from going soggy while maintaining a soft interior. In cooler weather, it can last a little longer; keep it in a cool, dry place to maintain freshness.Refrigerator: Store in an airtight container for up to 5 days. Toast before serving to bring back the best texture.Freezer: Slice before freezing and store in a sealed bag for up to 3 months. Thaw at room temperature before toasting for the best texture and even heating.

Toasting Tip
- Gluten-free bread takes a little longer to toast and may need a second round to reach that golden colour. Because WEATZERO® bread has a higher moisture content and no gluten structure, the surface takes a little longer to crisp up in the toaster; so give it an extra minute or two to achieve that golden finish.